Get Started with Raspberry Pi
Lesson Information
This lesson introduces students to the Raspberry Pi microcomputer. The goal of the lesson is to familiarize students to their development environment based on Linux. By the end of the class they will have solid understanding of the differences between software and hardware, and will be able to name a few important types of hardware/software as well as a few examples in each category.
The purpose of the lesson is to:
- Familiarize the students with Raspberry Pi
- Distinguish the differences between hardware and software
- Introduce students to Python
Driving Questions:
- What is the Raspberry Pi?
- What are the differences between software and hardware?
- What are some important pieces of software and hardware a computer require to work?
Computer Science Concepts:
- Hardware: Central Processing Unit (CPU), memory, hard drive, monitor, keyboard and mouse.
- Software Operating Systems (OS), applications(APPs), websites, programming languages.
Materials Needed:
Raspberry Pi 3s (barebone), this lesson plan
Target Skills:
- SWBAT understand that Raspberry Pi is a computer that runs linux
- SWBAT differentiate software and hardware
- SWBAT launch the Thonny Python IDE to program Python
Instructional Plan and Structure
Overview of the lesson (5 minutes)
Communicate to the students that we are going to do 3 things today: 1) learn what a Raspberry Pi computer is, 2) get a Raspberry Pi computer to work, and 3) start programming with the Raspberry Pi.
Ask the students what they think a computer might look like and what some of the vital parts are. Then introduce to the students the Raspberry Pi. Highlight the fact that it is small (the size of a credit card), inexpensive (costs only $35, so everyone can buy one), and incredibly powerful and fun to play with. And now we are going to learn what it is and how it works.
Raspberry Pi Unplugged (15 minutes)
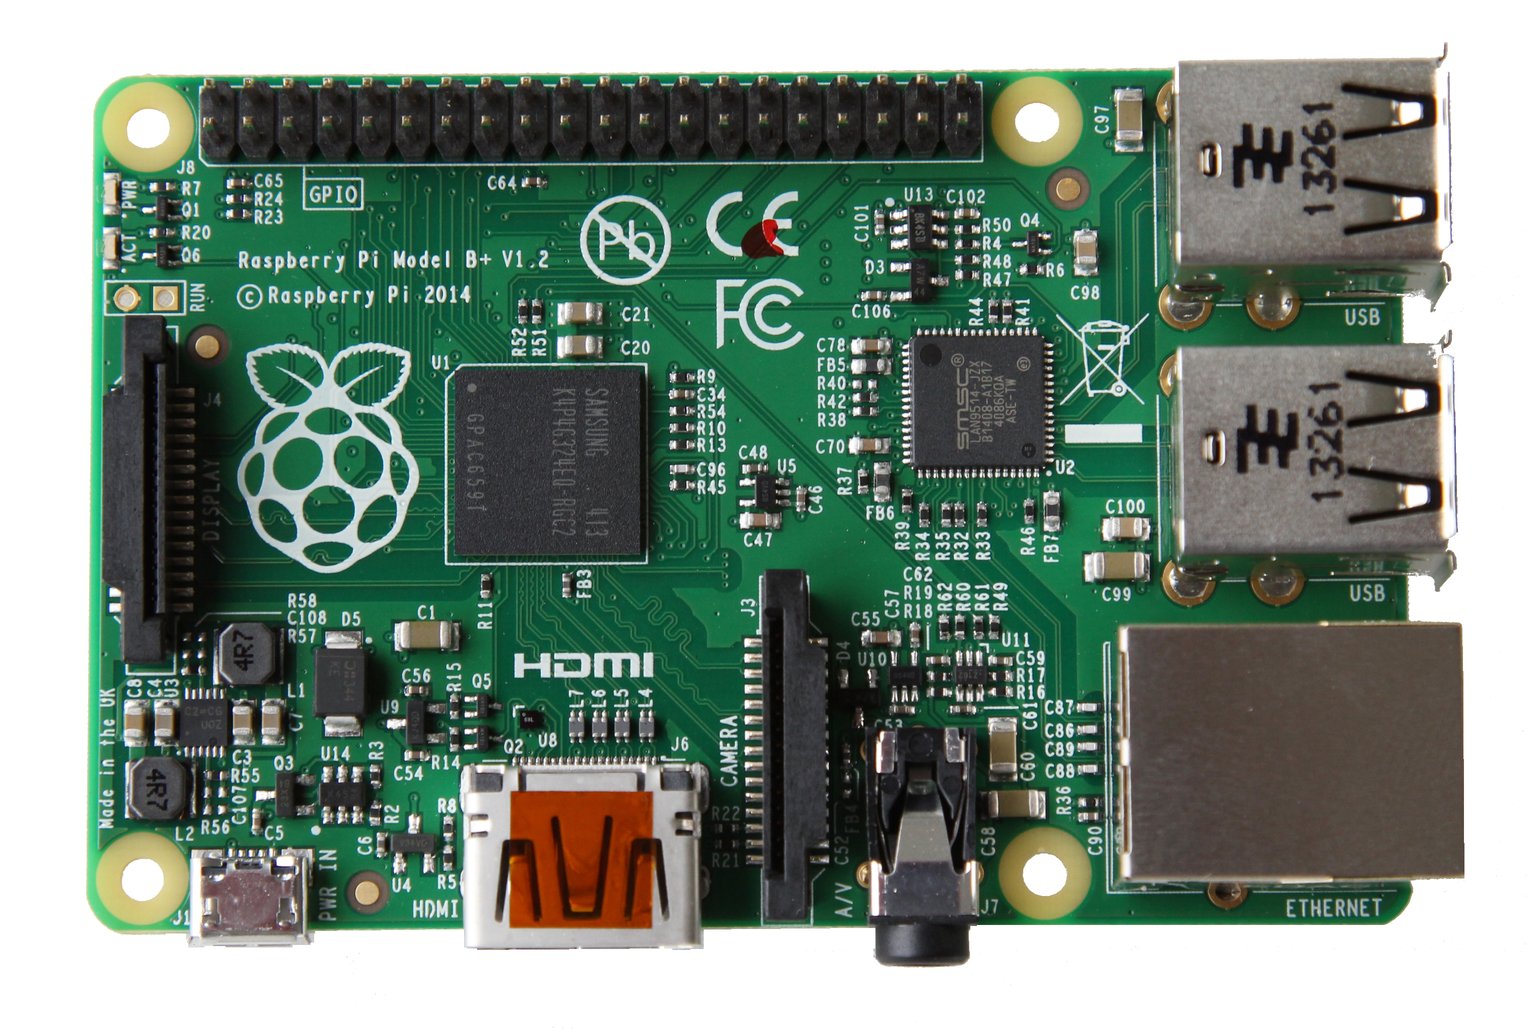
Hand out to the students the barebone Raspberry Pis (Those not in cases, or take the Raspberry Pis out of the cases). Ask the students to discuss what they think each parts are. A print-out of the image below might be very helpful:

Getting the Raspberry Pi to Work (15 minutes)
Now ask the students to assemble the Raspberry Pis. Introduce the cables and port names would be helpful. Those are:
- HDMI port on Raspberry Pi -> DVI port on monitor (secure the DVI port with the screws
- MicroUSB port on Raspberry Pi -> AC Power
- Power cable on monitor -> AC Power
- USB ports on Raspberry Pi - Keyboard and mouse
Raspbian - the Software (15 minutes)
Now that the students Raspberry Pis are up and running, go through the software systems of Raspberry Pi.
- The operating system (OS) of the Raspberry Pi is a version of Linux (No need to know Raspbian but Linux is important). What are the differences between Windows, MacOS, iOS, Android, and Linux OSes?
- Go through some of the software. Raspberry Pi is designed for kids to learn coding, so there are plenty of IDEs. There is a free version of office on Raspberry Pis as well (LibreOffice), and there are also games (Minecraft) and web-browsers (Chromium, a free version of Google Chrome).
- A very important software is called the terminal (which can be launched on the task bar). Open the taskbar and remind the students what computers were like before there were Graphical User Interfaces (GUI).
Get started with Python (5 minutes)
This part serves as a hook to next class’s activities. The students can start programming in Python in two ways:
- Type
python3in the terminal - Start Thonny Python found in the start menu
This starts an interactive programming environment (also called
REPL) of Python, indicated by the three arrows >>>. The students can
feel free to type whatever they like.
Review and Assessment
Answer the following questions:
- What is Raspberry Pi?
- What are the differences between software and hardware?
- What are some important pieces of software and hardware?
- Name the components of the Raspberry Pi on the picture below.